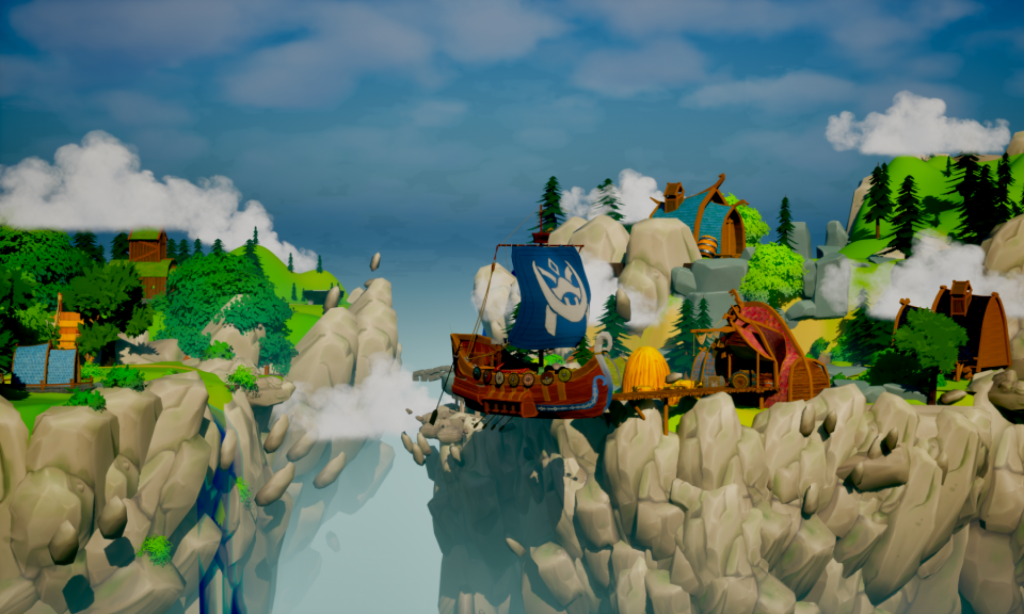
Group Project

Group Project Idea:
A short film about humanity’s disconnect from natural world, that brings awareness about current statistical environmental damage, ending on an enchanting hopeful message to the younger audiences.
Summary
I was responsible for setting up the core look and the render of the creatures and while doing the work assigned to me i also helped in various other ways which i am going to break down into sections below:
Shooting and VFX Data Acquisition
During production, Henry had originally booked and managed the camera equipment. However, because of an emergency, I took responsibility for keeping, transporting and returning it to UAL. This meant making sure the equipment remained safe and accounted for throughout the shoot.
My main technical responsibility was collecting VFX reference material, including HDRIs, clean plates and colour references. I successfully captured the required HDRIs, which were later used to help recreate the lighting conditions for the CG creatures.
However, not all the required reference material was captured correctly. I asked the camera operator, Misha to record the colour checker for each setup so that the references could be matched to the correct shots. Instead, still photographs were taken. Dedicated clean plates were also missed, although some takes contained sufficiently clear sections that could later be used to create them.
I recognise that I should have supervised this process more carefully. Rather than assuming the requirements were understood, I should have explained exactly what was needed, why it was important and checked the material before leaving each setup. In future, I would use a VFX data-acquisition checklist.
Lily and I later captured lens-grid footage. It was my first time operating the camera, so some recordings were slightly out of focus or not perfectly level, although most were usable.
The camera kit also provided only one usable battery. It ran out during the final shot, forcing us to arrange another shoot day. Because the lighting had changed, some material had to be reshot to maintain continuity.
Footage Preparation and 3D Setup
Two creature plates were filmed by the group. The remaining plates were purchased from Storyblocks because some required extremely wide or high viewpoints that were not practical to capture with our available locations and equipment. The cost was shared between the group.
I prepared selected footage for the VFX pipeline by converting it into linear ACEScg EXR image sequences. David’s tutorial videos were particularly useful in helping me understand this workflow. When I travelled to India for my brother’s engagement, I handed the prepared footage to Isabel so that colour correction could continue while I was away.
After returning, Lily and I worked together on denoising, lens undistortion and the creation of 3D environment proxies. The Storyblocks footage did not include the VFX-specific lens information we would ideally have recorded ourselves, so I manually worked on undistorting those plates in Nuke.
The proxy environments served two purposes. They provided 3D surfaces for receiving shadows and reflections, and they gave Lily spatial references for placing and animating the creatures within the live-action environments.
Once Lily’s animation was ready, I brought her animation camera into Houdini and assembled the shot using the prepared footage, the proxy geometry and the colour-corrected HDRI supplied by Isabel. This created the foundation for the effects, lighting and rendering stages.
This part of the process showed me how much technical preparation is required before visible VFX work can begin. Accurate colour management, denoising, undistortion, camera setup and proxy geometry were all necessary for the CG elements to integrate convincingly.
Creature Look and FX Development
I developed the ghost-creature look and smoke effects in Houdini and Redshift. Lily’s concept art was the main creative reference, giving me a clear target for the balance between colour, translucency, frosted areas and transparency. I also recorded jellyfish footage at a beach as real-world reference for translucency, softness, wetness, internal colour variation and silhouette readability. This informed the visual qualities of the shader.
Before beginning the look development, I cleaned and consolidated some of the supplied creature geometry. The effects setup worked best with continuous, watertight surfaces, so I removed unnecessary internal or separate elements and prepared the meshes for the mask and smoke systems.
The ghost effect was controlled using a manually painted attribute mask on the geometry. This mask determined which areas remained visible and where the creature transitioned from its original appearance into the frosted, transparent ghost effect. The Redshift material combined the base colour, a frosted layer, transparency and a subtle glossy surface. A User Scalar Data node read the painted mask, while a Fresnel-driven rim response helped preserve the creature’s silhouette in highly transparent areas.
The look-development process involved extensive trial and error. For some creatures, I produced approximately 100–150 iterations before reaching a suitable result. Each asset required adjustments because its geometry, texture, animation and environment affected the appearance.
I also created the smoke system. The animated creature was imported into Houdini and separated into emission and flow branches. Animated points controlled where smoke originated, while the flow branch controlled its movement. The result was refined, smoothed and converted into volumes. After caching, I added contrast and density controls so the smoke could be adjusted without rerunning the simulation.
Early tests
Creature look setup
smoke setup
Rendering and Compositing Handoff
For rendering, I created separate Redshift ROPs for the creature, smoke and environment/proxy elements. Each ROP had its own AOV setup, allowing the compositor to adjust properties such as colour, lighting, reflections and visibility rather than relying only on one flattened beauty render.
I also prepared the Houdini project for use outside my own computer. External assets such as Alembics, textures and caches used portable, project-relative paths rather than paths linked only to my local machine. This reduced the risk of missing files when the project was moved to another workstation or the university render farm.
The render farm had already caused problems during test renders, with machines sometimes being taken offline while jobs were running. The larger issue occurred close to the deadline, when the university farm was taken offline for maintenance and was scheduled to remain unavailable until 15 September, the project deadline.
Because waiting for the farm was not possible, we changed to local rendering. Before doing this, I checked the ROPs, AOVs, caches, paths and scene dependencies to make sure the shots could render correctly. Local rendering was slower, but it allowed us to continue producing the final elements.
After rendering, I checked the output sequences and handed the creature, smoke and environment elements to Isabel for final compositing in Nuke.
This experience showed me the importance of portable project organisation and having a backup rendering plan. In future, I would test both local and farm workflows earlier and allow additional time for final rendering.
ROP&AOV setup
Final Reflection
This project developed my understanding of the VFX pipeline from on-set data acquisition through to final compositing. My contribution included equipment responsibility, VFX reference capture, plate preparation, denoising, undistortion, 3D proxy work, Houdini scene assembly, creature look development, smoke effects, rendering and the handoff of finished elements to the compositor.
One of my most important lessons came from the shooting stage. Although I knew which VFX references were required, I did not check carefully enough that the correct material had been captured. The colour reference was recorded differently from what I had intended, and dedicated clean plates were missed. Some usable clean sections could be extracted from other takes, but this was not an ideal solution. I learned that VFX supervision requires more than giving instructions. It requires explaining why the data is needed, actively checking it and using a checklist before moving to the next setup.
The camera battery problem also showed me the importance of planning for equipment limitations. Running out of battery forced the group to arrange another shoot day, and the change in lighting meant that some shots had to be reshot for continuity. This reinforced the need to check equipment before production and to have contingency plans for technical failures.
The plate-preparation stage improved my understanding of the less visible work behind successful VFX integration. Working with ACEScg EXRs, denoising, lens undistortion, cameras, HDRIs and proxy environments showed me that the quality of the final CG integration depends heavily on the accuracy of the foundation created before effects work begins.
My biggest technical development came from the creature look and smoke effects. Translating Lily’s concept art into a working Houdini and Redshift system required extensive experimentation. Producing approximately 100–150 iterations for some creatures taught me not to expect the first version to work. Instead, I learned to compare each result with the reference, identify the specific problem and adjust the relevant part of the setup.
The painted attribute mask was particularly valuable because it made the material art-directable. I could control the transition between the creature’s original colour, the frosted ghost appearance and transparency without rebuilding the entire shader. The Fresnel rim also demonstrated how a small additional control could preserve the silhouette when the creature became highly transparent.
The smoke system developed my understanding of procedural FX. Separating emission placement, flow, rasterisation and density control made it easier to diagnose problems and make artistic changes. I learned that effects become more manageable when they are divided into clear, controllable stages.
I also gained a stronger understanding of rendering for compositing. Creating separate ROPs and AOVs for the creature, smoke and environment meant that Isabel had greater flexibility during the final composite. The render-farm outage then demonstrated why portable file paths and backup workflows are important. Although the farm was unavailable near the deadline, the project could be rendered locally because the scene and dependencies had been checked and organised.
Finally, the project strengthened my understanding of collaboration. My work depended on Lily’s concept art and animation, Isabel’s colour correction and HDRIs, Tim’s creature models and David’s instructional material. In return, my outputs had to be organised clearly so they could be passed into the compositing stage. I learned that successful VFX work is not only about creating an effect; it is also about communicating, preparing assets correctly and making sure each stage can be used by the next person in the pipeline.
Overall, the project improved my technical problem-solving, Houdini and Redshift skills, and awareness of production planning. It gave me a clearer understanding of how a VFX shot develops from an initial concept and live-action footage into a prepared, rendered element ready for final compositing.
Final uncomped renders
AI Writing Disclaimer
AI tools were used to help organise, edit and refine the wording of this blog. The project details, responsibilities, experiences and reflections are my own, and I reviewed the final text to ensure that it accurately represents my contribution.
Personal Project
Project Concept
The starting point for this project was the idea of not losing the sense of curiosity and wonder that we often associate with childhood. I wanted to create a short VFX film about someone whose life had become repetitive: work, eat, sleep and repeat.
The story follows a character, played by myself, who discovers an old toy while working at his desk. The toy creates a brief moment of nostalgia, but he eventually puts it aside and goes to sleep. During the night, a portal appears and a living version of the creature represented by the toy enters the room.
When the character wakes, his first reaction is uncertainty and fear. However, curiosity eventually takes over and he approaches the creature. When he touches it, the creature evolves into another form. The portal then reopens and the creature begins to leave, but before disappearing it invites the character to follow.
The final shot shows the room and desk empty.
For me, the creature represents the curiosity and imagination that the character has gradually lost. Following it through the portal represents choosing, even temporarily, to step outside the routine he has created for himself.
Production and On-Set VFX
My planned workflow combined live-action footage with Maya, Substance 3D, Houdini, Redshift, Nuke and DaVinci Resolve.
The film was shot in a friend’s room. I worked as the director, actor and on-set VFX supervisor, while my friend operated the camera and my girlfriend handled lighting. She also created the physical toy used during filming, giving me a practical object to interact with and helping connect the real-world scene with the later CG creature.
The film was actually shot twice.
During the first shoot, I became too ambitious with the number of shots I wanted. Once I assembled the footage, the edit was over five minutes long, far beyond the intended one-minute brief. Rather than forcing the original material to work, I decided to simplify the narrative and reshoot only the shots that were genuinely necessary.
Although this initially felt like starting again, the second shoot was much stronger from a VFX perspective. Through David, I now had access to a colour checker, chrome ball and grey ball, which allowed me to gather much better lighting and colour references. I also captured 360° HDRIs, measured the table and environment, and recorded camera height and distance for each VFX shot. A lens grid captured previously with the same camera was also available.
This was one of the first stages where I noticed a change in how I approached production. During the first shoot, I was mainly thinking like a director and actor. During the second, I was also thinking ahead to what I would need once I reached Maya, Houdini and Nuke. It made me understand that successful VFX starts on set rather than in post-production.
Footage Preparation and Asset Development
The selected footage was taken into DaVinci Resolve and prepared for a linear VFX workflow. David’s tutorials were particularly useful at this stage because they made the colour-management and EXR preparation process much clearer.
I exported EXR sequences for the main VFX pipeline and lighter reference files for use during 3D work.
In Maya, I created proxy geometry for the environments in the three main VFX shots so that the CG assets could interact more convincingly with the live-action plates through shadows, reflections and positioning.
I also created the two creature forms and the egg asset, corrected UV problems, prepared textures, rigged one creature and completed its animation.
Due to time constraints, I was unable to fully rig the second creature. This forced me to prioritise the elements essential to completing the shots rather than continuing to expand the project.
The finished assets were then transferred into Houdini for the three main effects: the portal, egg disintegration and creature groom.
Houdini Effects Development
Portal
The portal began from an older Houdini tutorial. However, the tutorial was created using a significantly older version of Houdini, and several parts of the workflow no longer translated directly.
This became unexpectedly useful.
Instead of simply recreating a node network, I had to understand what each section was actually doing and why it was needed. I then rebuilt and modified those ideas to suit my own shot.
The final portal used several particle behaviours and layers to build its shape, motion and density. Early versions became too thick and generated unnecessarily high particle counts, so I repeatedly simplified and optimised the system until it became more controllable.
Over time, the setup moved increasingly away from the original tutorial and became my own interpretation of the effect.
Egg Disintegration
The egg effect required a different approach. I prepared both intact and fractured geometry and developed the disintegration so that the shell gradually broke into smaller pieces and particles rather than simply disappearing.
I also had to solve problems when transferring animation and UV information between Maya and Houdini. These issues reminded me that simulation work depends heavily on how well assets have been prepared earlier in the pipeline.
The interior surfaces of the broken shell were also treated separately so that newly exposed areas remained visually believable during the disintegration
Creature Groom
For the creature, I created the groom in Houdini using guides generated from the animated body.
Initially, the fur looked too clean and uniform. It felt more like perfectly brushed hair than the softer and slightly irregular surface I wanted. I therefore introduced more variation into the guide direction, length and distribution.
I also created masks around areas such as the eyes to prevent fur from growing into unwanted parts of the model.
The biggest thing I gained from these three effects was confidence. I became much more comfortable looking at a system, understanding its purpose and then changing it rather than assuming that a tutorial or existing method had to be followed exactly.
Rendering and Compositing
After the effects were prepared, I created separate Redshift render setups for the creatures, effects and environment proxies. Keeping these elements separate gave me more control later in Nuke, particularly for shadows, reflections, opacity and colour adjustments.
The intention was to complete the compositing in Nuke and then use DaVinci Resolve for the final overall colour grade.
The final stages of this project overlapped heavily with my group project. Unexpected problems within that production, including unavailable team members, render-farm downtime and software/server issues, meant that I had to take on substantially more work than originally expected.
Because both projects were technically demanding, this had a direct impact on the amount of time left for refinement. Although the main effects and pipelines for my individual project were completed, some shots remained at a proxy or work-in-progress render stage rather than reaching the final level of compositing I originally intended.
That is something I would change in a future project, but I do not consider the unfinished polish to erase what was achieved. The portal, groom and disintegration all pushed me into unfamiliar areas, and the project gave me a much stronger understanding of how live action, 3D, simulation, rendering and compositing connect as one VFX pipeline.
Final Reflection
When I first planned this project, I mainly thought about what I wanted the audience to feel. The idea came from something quite simple: as life becomes busier and more repetitive, it is very easy to lose the curiosity we had when we were younger. The creature, the toy and the portal were my way of turning that feeling into something visual.
Looking back now, I think the project ended up teaching me something similar to its own message.
I started with a very ambitious idea and wanted to do almost everything myself: directing, acting, modelling, rigging, animation, effects, lighting and compositing. Part of that came from wanting to challenge myself. I wanted to find out how much of a complete VFX pipeline I could actually handle and where my weaknesses were.
The answer was that I could handle much more than I expected, but I also learned that being capable of doing something does not necessarily mean that doing everything is the best decision.
The first shoot is a good example. I had created far too many shots because I was excited about the story and wanted to include everything. When the first edit came to more than five minutes, I had to accept that the project had become much larger than the brief. Reshooting initially felt frustrating because it meant abandoning work I had already completed, but it ended up improving the project considerably.
On the second shoot, I approached the set differently. I was not only thinking about performance and framing anymore. I was thinking about HDRIs, colour references, camera measurements and how I would reconstruct the environment later. That change made me feel much more like a VFX artist working on set rather than someone simply shooting footage and solving problems afterwards.
The Houdini work probably represents the biggest technical change in me during the project.
While researching references for the portal, I came across an existing setup that was visually close to what I wanted. It gave me a useful starting point, but there was a major difference between the Houdini version it had been created in and the version I was using. Because of that, I could not treat the setup as something that could simply be transferred directly into my project.
I had to study it, break it apart and understand what each section was doing at a fundamental level.
The process almost felt like becoming a doctor and dissecting the setup down to its core. I needed to understand which parts were responsible for the motion, shape, density and overall behaviour of the effect, which techniques were still relevant, and which parts needed to be rebuilt or replaced for a modern Houdini workflow. Once I understood those underlying ideas, I could take only what was useful and reshape the system around the needs of my own portal.
That was an important change in the way I approached technical references. I stopped seeing them as instructions and started seeing them as systems that could be analysed, understood and adapted.
That mindset carried into the disintegration and groom work as well. I became more comfortable experimenting, getting something wrong, understanding why it failed and rebuilding it. I think that confidence is more valuable to me than any individual effect I produced.
The project also taught me a much less technical lesson about workload and collaboration. My group project experienced several unexpected problems, and I ended up taking on far more responsibility than I had originally planned. At the same time, my individual project still had to continue. For a period, it genuinely felt as though I was trying to complete two individual projects at once.
I would be lying if I said that did not affect the final work. It did. I lost time that I wanted to spend refining the composites and some shots therefore remained closer to proxy renders than I would have liked.
However, I also do not want that to become the only way I remember these projects.
I learned how much communication and reliability matter within a team. I learned to prioritise when there was simply too much work to complete perfectly. I learned that sometimes finishing the important parts of a project is better than endlessly polishing one area while everything else remains unfinished.
Most importantly, I learned that I actually enjoy the problem-solving side of VFX. The moments I remember most are not when everything worked immediately. They are the moments when something did not work, I had no obvious answer, and eventually I found one.
If I approached the project again, I would reduce the scope earlier, protect more time for compositing and set clearer limits on what I could realistically achieve. But I would still choose to challenge myself.
I started this project wanting to make a film about rediscovering curiosity. In a slightly unexpected way, the process reminded me why I enjoy VFX in the first place: experimenting, studying how things work, learning something unfamiliar and seeing an idea that originally existed only in my head gradually become visible.
AI Writing Disclaimer
AI tools were used to help organise, edit and refine the wording of this blog. The project details, responsibilities, experiences and reflections are my own, and I reviewed the final text to ensure that it accurately represents my contribution.